Have you heard of them? Pion Design in Sweden manufactures THE best soft, romantic papers you've EVER seen. Before their DT Call closed, Jenny Erickson contacted me to guest design (check out the announcement here that was posted last week) and my box of goodies is due to arrive ANY day now. But then I woke up this morning to an e-mail requesting a DT term of a YEAR as their Canadian representative. I couldn't say yes fast enough. I am soooooo thrilled. Check-out the glorious collections and stunning vintage photo cut-outs below. I'll post the entire international DT list once it is released but if you want to check out some fabulous work visit the Pion blog, or my friend and GDT girl Toni Kelly's blog (aka 2Dogs on Sb.com) for amazing inspiration. I can't wait for my box to arrive and dig-in!
Saturday, March 19, 2011
Tuesday, March 15, 2011
Fuzzy Lollipop Flower Tutorial
I just love the new Prima Innocence 2 flowers and was inspired to make my own using some inexpensive thin mulberry paper (can be found at most local artist materials supply shops - where university art students buy from have the best prices though). You can use thicker paper like people use for making tear bears but then the cost is a lot more and probably worth just buying the Prima ones, LOL.
Supplies you will need:
- a sheet of mulberry paper (a 12x12 sheet will yield 3 good sized flowers of 2-3 inches each)
- a very firm bristled toothbrush (if you don't have a wire brush used for tear bears)
- a Q-tip type cotton swab
- a decorative brad
- a little pot of water
- pearl strand (optional, not shown)
Step 1: Using the Q-tip, freehand "draw"one water circle at a time and then with dry fingers gently pull out the circles. For a 2-3 inch flower you will need 7 circles (anything bigger use 9 circles). You will want to progressively get smaller with your circles.
Step 2: Stack the flower larger to smaller circle and secure with your brad.
Step 3: Brush the layers all around, stroking from middle to outer edge to make the paper fuzz a little more.
Step 4: One layer at a time, starting with the smallest, crumple them up toward the center as shown below. Be careful not to pat down the fuzzy edges though.
Step 5: Carefully open up the layers starting with the largest circle. This circle flower is about 2 inches in diameter.
Step 5: You can further decorate your flower by adding a ring of string pearls around your decorative brad but be careful not to put too much glue as it will stain the thin paper. The larger flower below is over 4 inches in diameter and I used 9 circle layers for that one.
Here are the original Prima flowers I used as inspiration. I suspect they are made of thick mulberry but I have not seen these yet in person. Just fell in love with this picture and had to try making something similar for an upcoming layout.
Thanks for stopping by. As always, I am more than happy to share how I make my flowers but should you make them yourself and post online, please give credit where due (as these tutorials do take a fair bit of time to produce). TFL!
Monday, March 14, 2011
March Prima BAP & Palette
OK, I think I am addicted to this challenge since I have had the honour of being featured on Prima's blog since I started these sketch contests a few months ago. This month pushed me out of my comfort zone which is a good thing. I've been hanging on to this adorable pre-sewn background paper for way too long and it was time to use it. FYI - I don't sew ANYTHING since I failed my grade 12 project many moons ago, LOL. I made good use of some Prima packaging too. Too pretty to throw away :). This layout was a little inspired by Janine on the Prima DT as she always does amazing layouts with circles.
So funny story behind this picture. We were Spring camping, it was dusk, almost supper time and were freezing and hungry. I stuck my daughter's daytime vest overtop of her bunting suit, with a bib (ready to eat) and bundled in a blanket. She was such a fashion hazard we had to take a picture. Surprisingly it worked out really well for this layout, LOL. I just love these peach Prima flowers too!
Here is the Prima sketch I used...
Lastly, I didn't do the palette this month but I am posting it in case you wan to give that contest a go too!
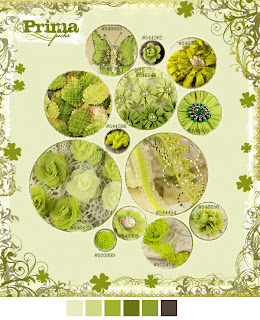
Prima's Product Picks for March are filled with lots of lucky leprechaun greens! We never knew green could look so GOOD!
Just look at these gorgeous NEW products:
- Butterflies
- Arco Iris Flowers
- Deshire Flowers
- Lovely Leaves
- Delightful Day Flowers
- Raffia Flowers
- Champagne Roses
- Crystal and Lace borders
- Trinkets
- Cabachon Flowers
- Lace
- and DeSoie Flowers
Sunday, March 13, 2011
Creative Scrappers #147 Reveal
Today is reveal day for my fist DT project with Creative Scrappers! Here is my take on the sketch #147. It's no secret that I love Amarilys' sketches and this one was no exception. I used my left-over scraps from the March Scrap That! kit, featuring G45 and BG papers. I just love this picture of my daughter in our backyard last summer.
I'm not usually one for a lot of fussy cutting but these papers were too cute and perfect not to. I'll be turning this 5x7 layout into a door hanger for my daughter's room. I also did this layout for the ScrapFIT Glitter and Glam challenge. The prize this month is very motivating - go check it out!
Thanks for stopping by and please be sure to check out what the rest of today's team revealed over at Creative Scrappers!
Subscribe to:
Posts (Atom)


