
Anatomy of a layout
(featuring Bo Bunny's "weekend market" collection)
Hi, I have done a step-by-step tutorial of a layout created with my June Swirlydoos "Antiquities" Kit and wonderful Helmar Glue. I have used "BB" in this tutorial to refer to Bo Bunny.
Step 1 - PREP THE BACKGROUND
Cut a jagged half inch strip off each side to the BB Antique (cream) paper, ink all the edges, and glue to the dark side (brown) of the BB Weekend market paper using Helmar's adhesive runner... BUT do not glue all the way to the edges. Next, make a small tear at the top right of the cream paper and ink the white edges revealed. Lastly, using a thin object (like a skewer) to curl back your tear and all 4 cream paper corners.

Step 2 - ADD THE LAYERS
Glue a BB cameo trinket at the bottom of the tear you made using Helmar 450 Quick Dry glue. Next, cut a 5"x 10.5" rectangle of burgundy paper (I used Simple Stories - red dot paper from the "Awesome" collection), and 4.5" x 8" rectangle of the cream BB Tapestry paper and then 3" x 10" rectangle of the BB Rulers paper (the backside has the black scroll design). Ink all the paper edges and glue as shown (burgundy first, orange second and cream last) using Helmar's adhesive runner.

Step 3 - CREATE A DIE CUT + ADD THE PHOTO
Either fussy cut the scroll design from the backside of the BB Stripe paper or (as I have done), use a previous collection BB die cut paper as a "stencil" and cut out a bracket shape from the patterned paper. Add a horizontal 5" x 7" picture to your layout (with a half inch cream border around the 3 sides) with Helmar Acid Free glue. Then, glue the bracket shape along the bottom of the picture too using the acid-free glue.
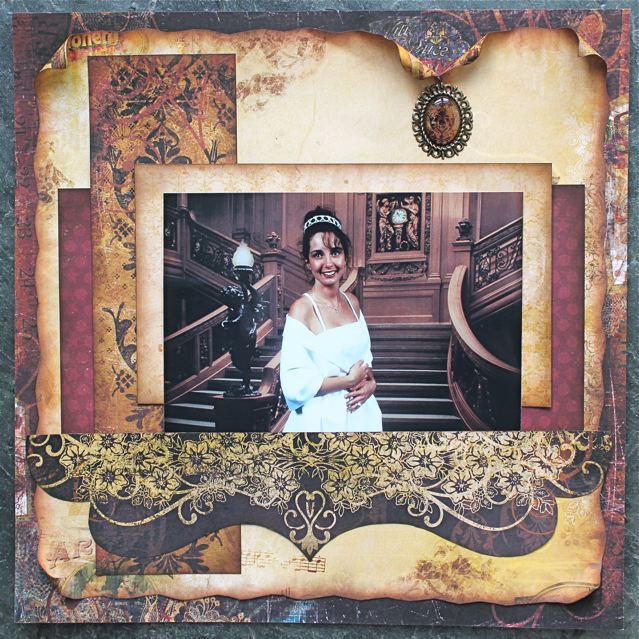
Step 4 - CREATE + ADD THE EMBELLISHMENTS
Make a big bow with wide copper ribbon and glue a cream flower (mine is Prima) in the middle with Helmar 450 Quick Dry glue. Glue your bow embellishment to the bottom left of the photo using the 450 glue too. Now, add some bling - I cut a Prima bling in half and added it to each bottom side of the photo. Lastly, add the title and you're done!

Please join Helmar on June 15th for a wonderful Father's Day celebration blog hop! See you back here on Friday!


11 comments:
Thanks a billion times Vicky for the tutorial! This is exactly what I need! My layouts are so boring and actually I have not wanted to do any for a long time, but this gets me sooo excited to work on my albums again!
TFS your awesome tutorial, Vicki!
great tutorial I want to run home and try it now.
Love it!! :-)
Beautiful page and great tutorial. xx
Beautiful papers and elements perfect for the beautiful bride!
Fab tutorial Vicky and a beautiful page... ADORE those papers!! :))
love these papers...the colors didn't appeal to me at first but I love your layout. thank you so much for the tutorial!
Wow it's so beautiful!!!Love this
Hugs from France
Rosesarah
Thanks for this beautiful tutorial. I love this all.
Beautiful page and great tutorial. xx
Post a Comment